Graph Editor
The graph editor is where you build and organize your Quick Menu graphs.
Opening the Editor
- Double-click a Quick Menu Graph asset in the Content Browser
- Or right-click a graph asset → "Edit"
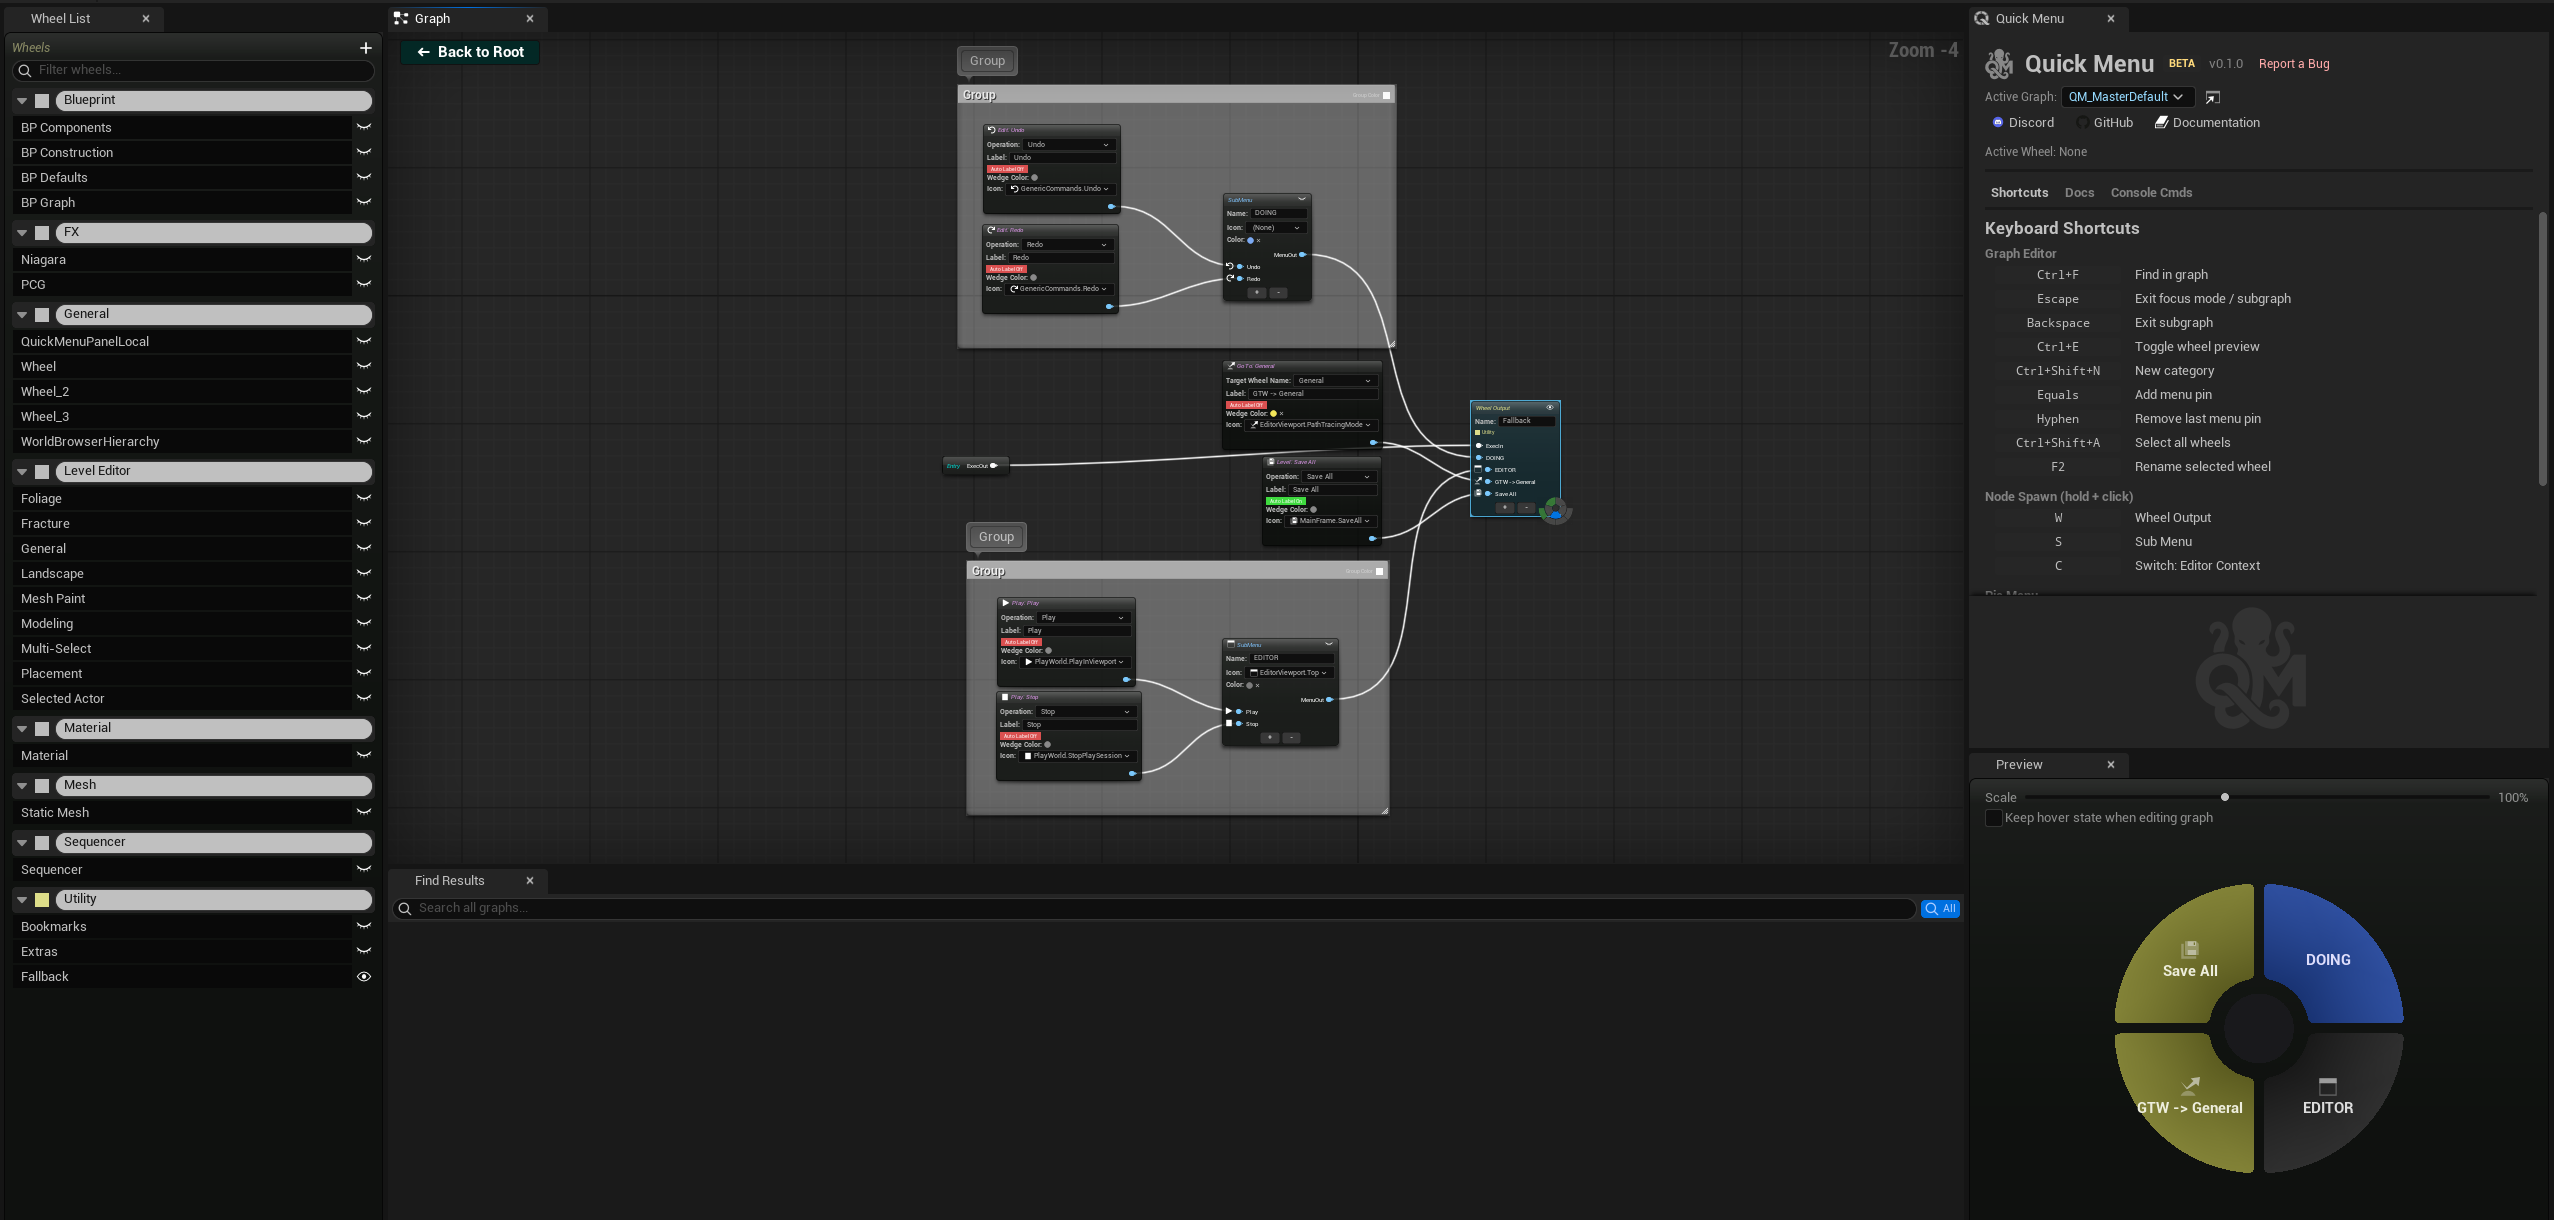
Editor Panels
Graph Canvas (Center)
The main node graph. Drag, zoom, connect nodes. Right-click for the context menu to add nodes.
Wheel List (Left Sidebar)
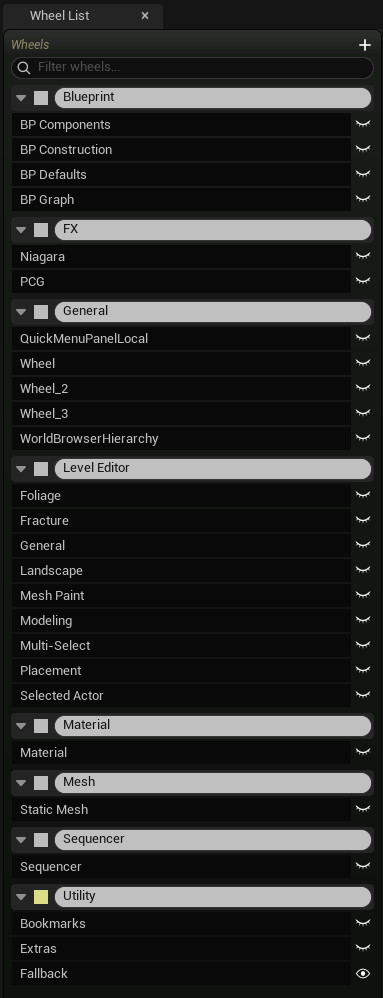
Displays all WheelOutput nodes organized by category.
Features: - Click a wheel to select it in the graph canvas and show it in the preview - Double-click to enter Focus Mode - Drag a wheel up/down to reorder within its category - Drag a wheel onto a category header to move it to that category - Multi-select with Shift (range) or Ctrl (toggle) - Search/filter box at the top — type to filter wheels by name - Right-click a wheel → Rename, Delete, Move to Category - Right-click a category header → Rename, Change Color, Change Icon, Delete Category, New Category
Category system: - Categories are collapsible groups with a colored header - Each category can have a custom color and icon - Wheels without a category appear in "Uncategorized" - New categories auto-create when you drag a wheel to the "Drop here for new category" zone - Category state (collapsed/expanded) persists between sessions
Preview Panel (Right Sidebar)
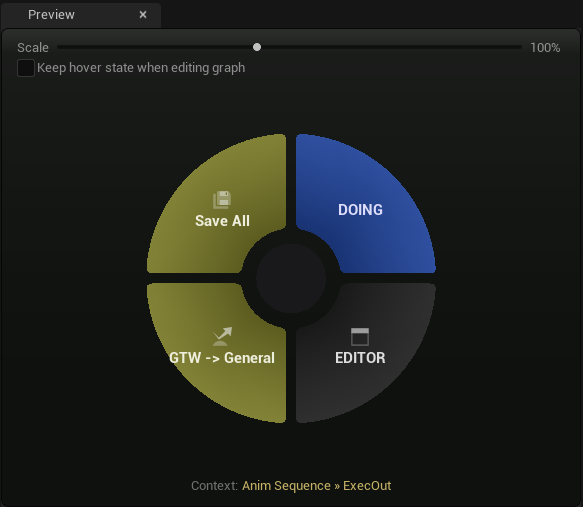
Live, interactive rendering of the selected wheel as a pie menu.
Features: - Live updates — any change in the graph is reflected in the preview after a short debounce - Interactive — click wedges to test actions (they execute for real), hover to see highlights - "+" button — add actions to the wheel directly from the preview (opens action picker) - "X" buttons — remove wedges inline - Scale slider — drag to preview at different sizes (1.0x to 2.0x) - Sub-menu expansion — hover a sub-menu wedge to see children expand as nested rings - Toggleable — show/hide with toolbar button or Ctrl+E
What it shows: - When a WheelOutput is selected: that wheel's wedges with labels, icons, and colors - When a single action node is selected: a temporary preview with just that action - When nothing relevant is selected: the last previewed wheel
Find Results (Bottom)
Opened with Ctrl+F. Search across all nodes in the current graph.
- Type a query and press Enter — results list all matching nodes
- Double-click a result to zoom the graph canvas to that node
- Matches node names, labels, and property values (e.g., searching "Translate" finds TransformMode nodes set to Translate)
- Results show a badge indicating which subgraph the node belongs to
Focus Mode
- Double-click a WheelOutput in the Wheel List to enter Focus Mode
- Only that wheel's connected nodes are highlighted; everything else fades
- The preview panel shows that wheel
- Click the breadcrumb bar or press Escape to exit
Comment Nodes
- Press C with nodes selected to create a group comment around them
- Double-click to rename
- Click the color swatch to change the comment color
- Resizable — drag edges to fit your node group
- Alt+E — create a comment auto-named from the first SubMenu/WheelOutput found in selection, with a random saturated color
- Right-click a comment → Auto Name & Color — automatically renames from contained SubMenu/WheelOutput and assigns a random color
Two Workflows
Quick Menu supports two ways to build menus:
- Graph-first: Open the graph editor, add nodes, connect pins, see the result in preview
- Wheel-first: Press V in the editor, see what's there, add/remove actions inline with + and X buttons, press E to fine-tune in the graph
Both workflows edit the same underlying graph — changes made inline are reflected in the graph, and vice versa.